Settings and Configurations
Set up your Default workspace
Default settings are divided into two categories:
User Settings: Each user is responsible for setting and updating their own individual preferences. Some user settings can be controlled, or set by, admins
Workspace Settings: Managed by admins, these control settings that apply to the entire workspace.
User settings
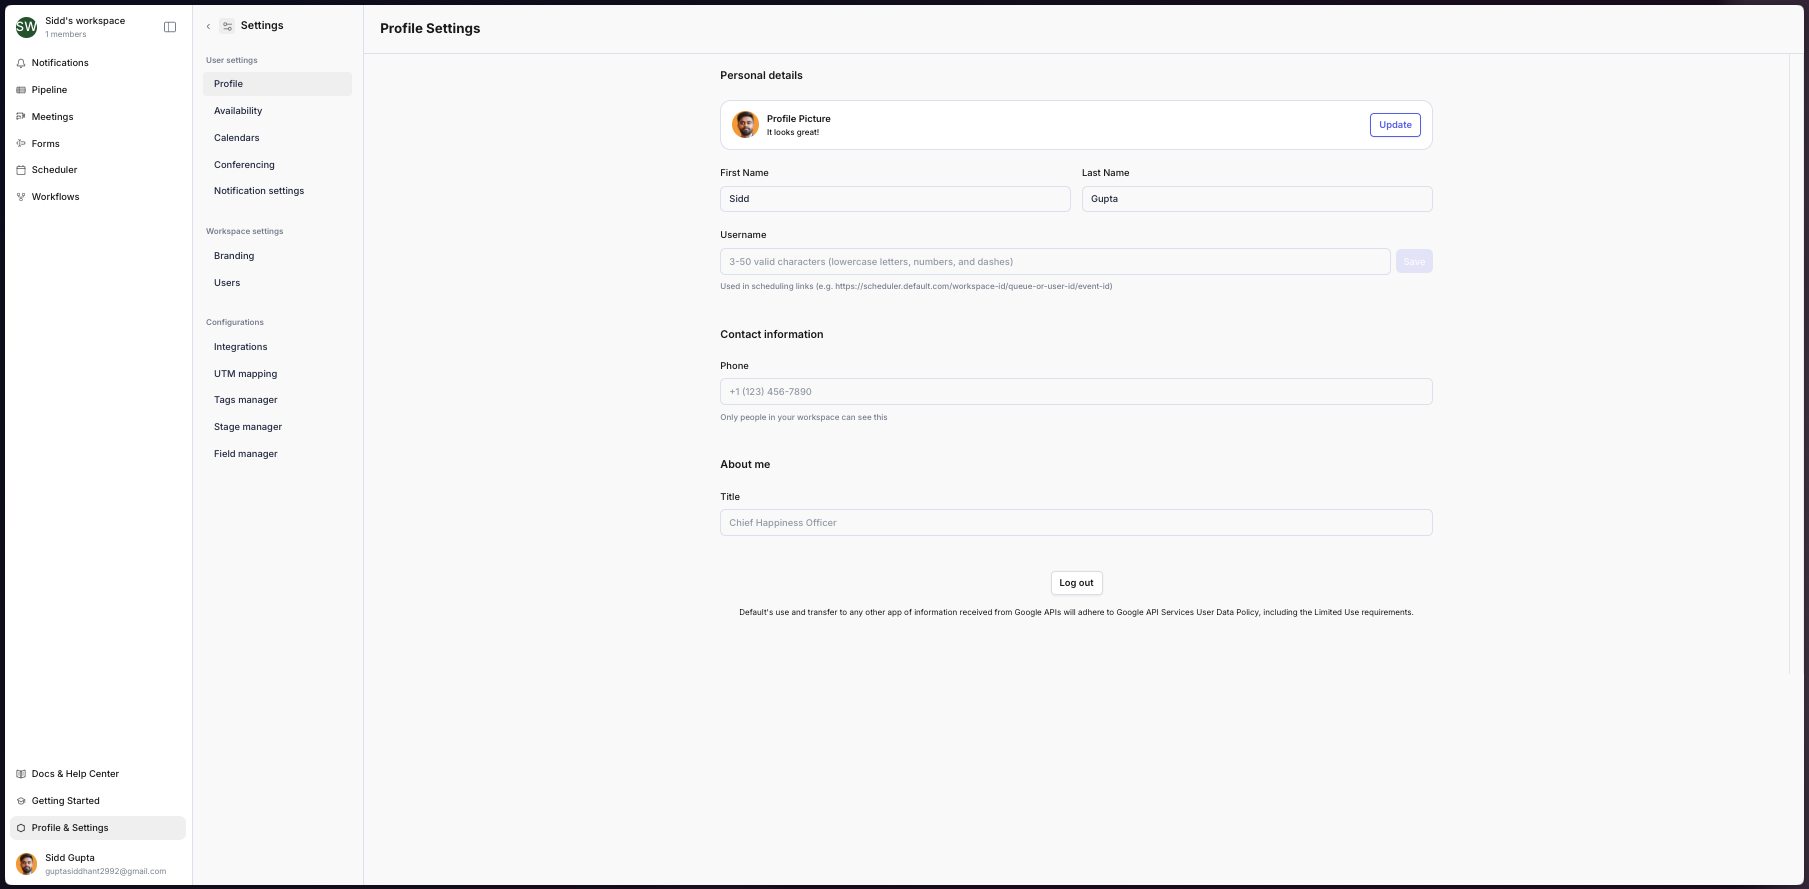
✏️ 1. Update user information
Updating your user information is essential, as Default references this throughout the product—for example, in emails sent to prospects and variables used in workflows. Make sure the following are updated:
First Name
Last Name
Username: Used to personalize scheduling links (e.g.,
joe-smithinstead of a randomly generated scheduling ID)
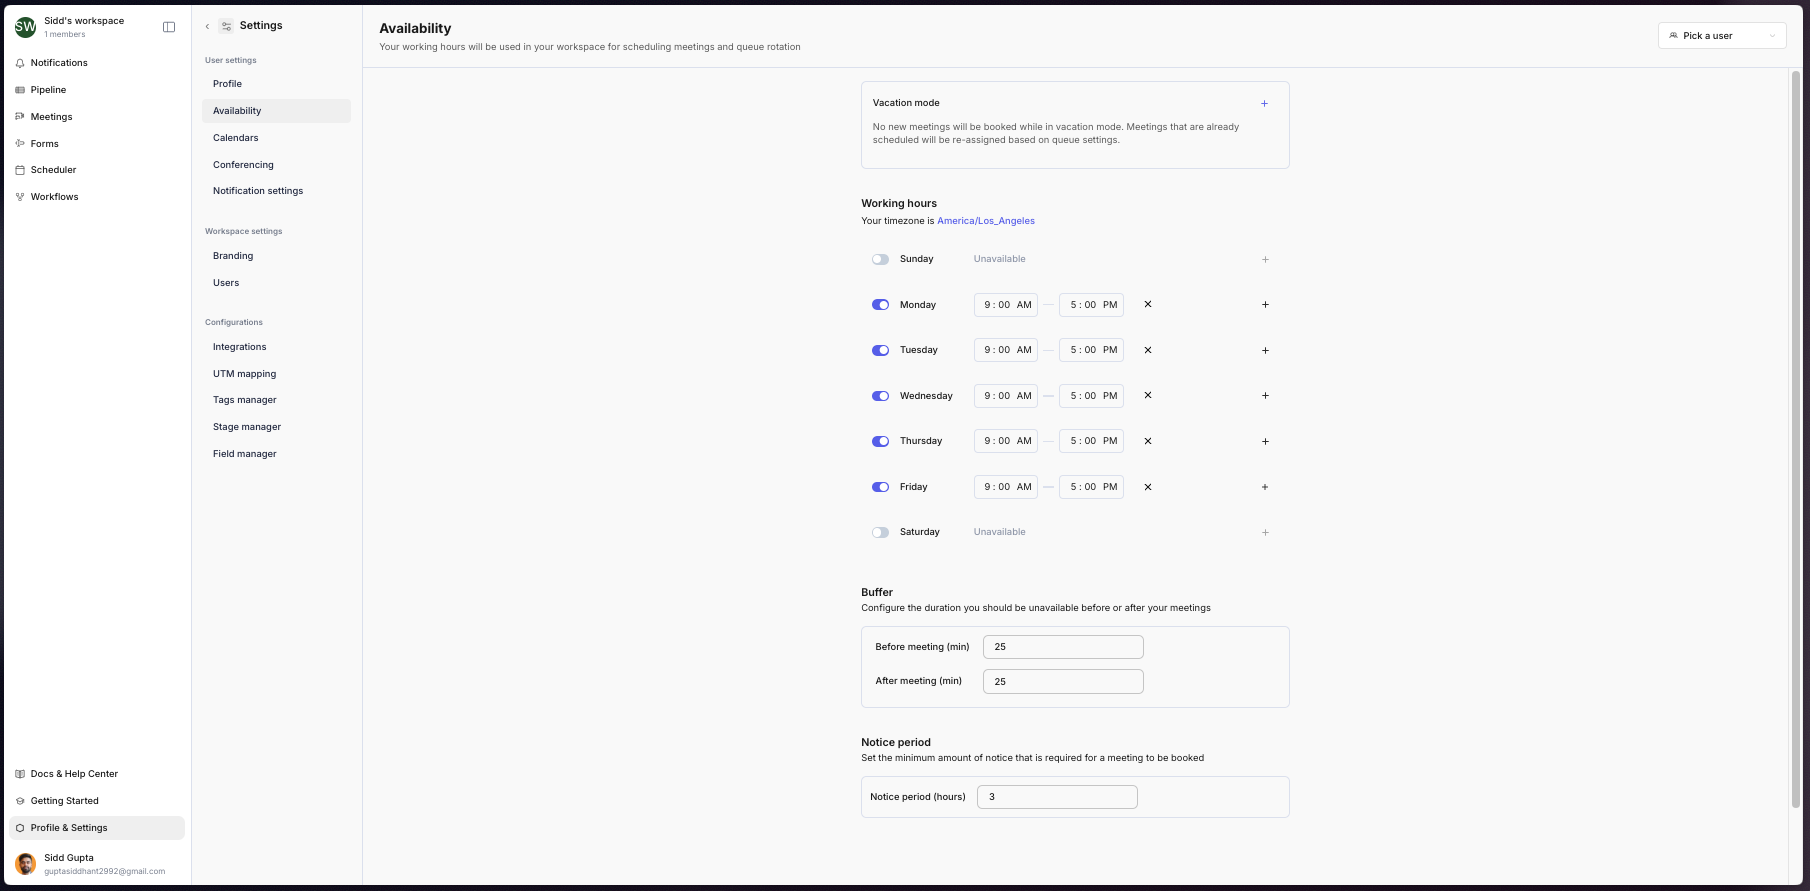
⏰ 2. Set availability
Vacation mode helps ensure you’re not booked for meetings while you’re out of the office. When enabled, it automatically disqualifies you from receiving any meetings during your marked OOO period. Default also syncs with your calendar availability. If your calendar is marked as busy, Default will block meeting invites—so you can relax and enjoy your time off! ☀
Note: Please make sure to deactivate vacation mode upon return!
Customize your working hours to reflect your daily availability. You can even add multiple time slots within a single day for added flexibility. These settings are crucial for lead routing and meeting bookings, ensuring everything aligns with your schedule. Default automatically detects your timezone, but you can easily update it.
For example, if you’re working from London, you can set it to UK/Ireland/Lisbon Time to stay in sync.
Note: Double check your working timezone to ensure your availability is correctly reflected to leads who are trying to book time with you.
Meeting buffers and Notice period
Meeting buffers: Set the number of minutes Default should mark as unavailable before and after a meeting.
Notice Period: Define how many hours a lead or customer must wait before they can see the earliest available time slot.
🗓️ 3. Add calendar(s)
If you’ve already linked your primary calendar during onboarding, great! You should also sync any additional calendars for Default to use when checking your availability. This ensures Default has a complete view of your schedule for accurate bookings
Note: Default can only book a meeting on a team member's primary calendar.
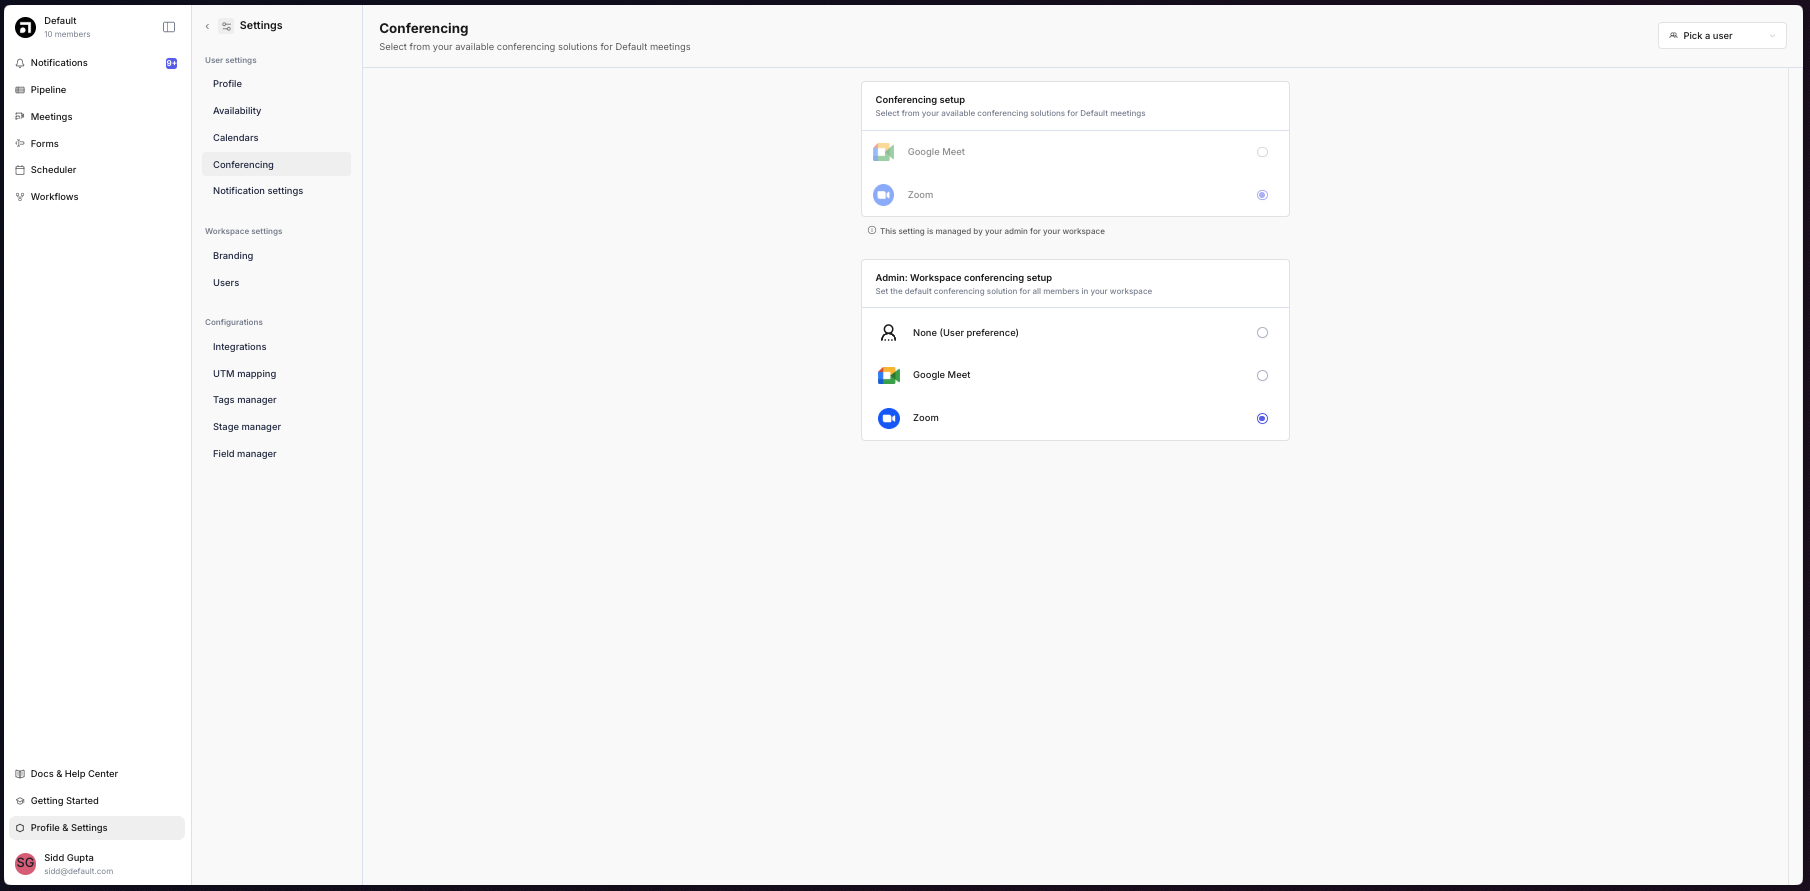
💻 4. Pick a meeting provider
Select Google Meet or Zoom as your meeting provider:
Google Meet: The default option, which does not require any further setup. This is added as a part of your Google Calendar.
Zoom: Click here for setup instructions.
Workspace settings
🗂️ 1. Manage user access
Admins can manage roles and permissions by selecting the appropriate user in the User Mapping column.
2. User mapping
Connect users with the role
memberto the right integrations (e.g., Salesforce, HubSpot, Outreach) to enable seamless referencing within workflows.
Note: Users with the role member must be mapped to their respective integration in order to referencing in workflows - e.g assigning a meeting to a record owner id from your CRM.
Configurations
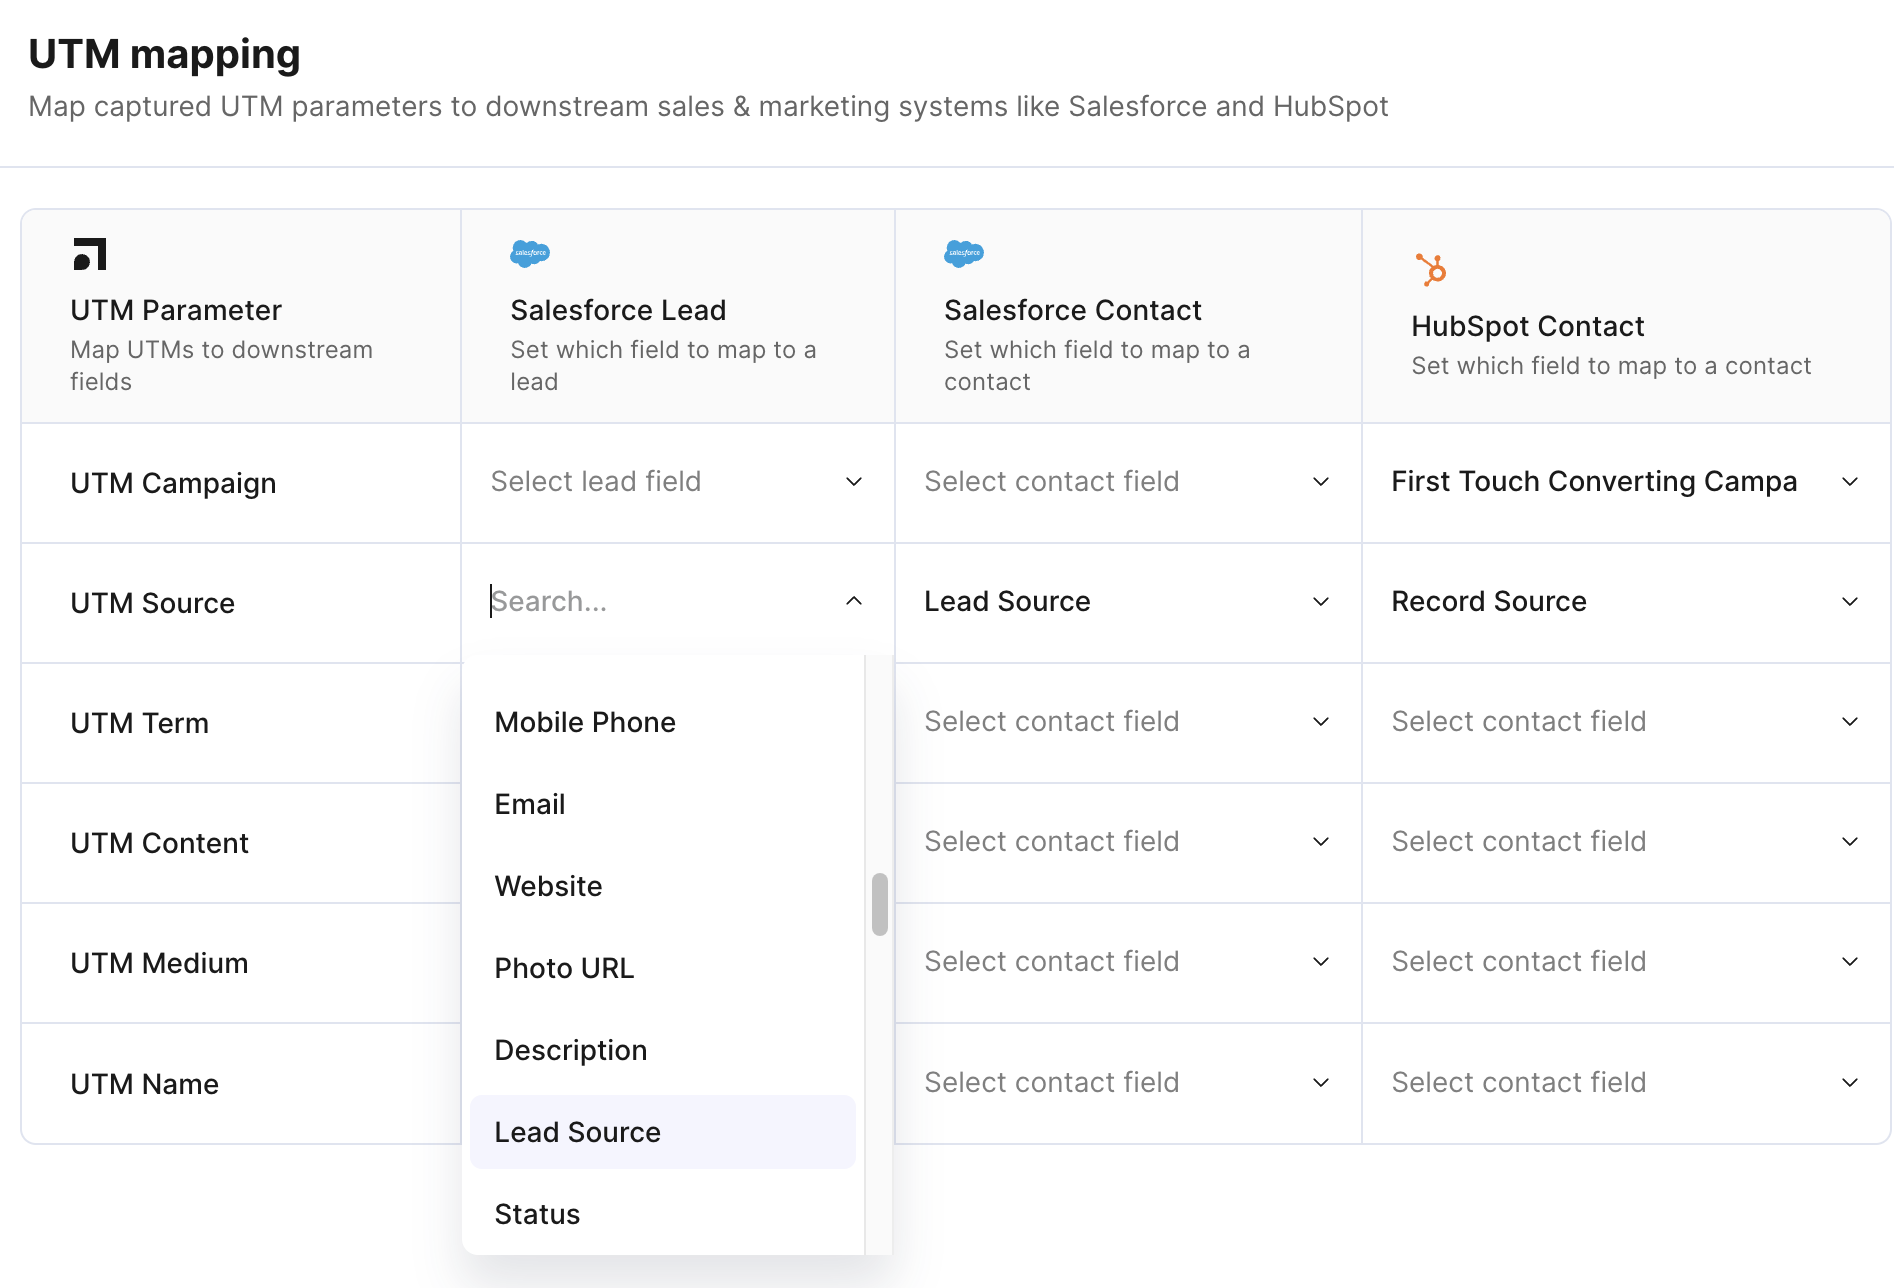
🔗 1. UTM mapping
To track and map UTMs in Default, ensure the Default Pixel is added to all relevant landing pages. For detailed instructions and best practices, check out our help guide on tracking UTMs with Default’s tracking pixel and automatically passing those parameters to your CRM.

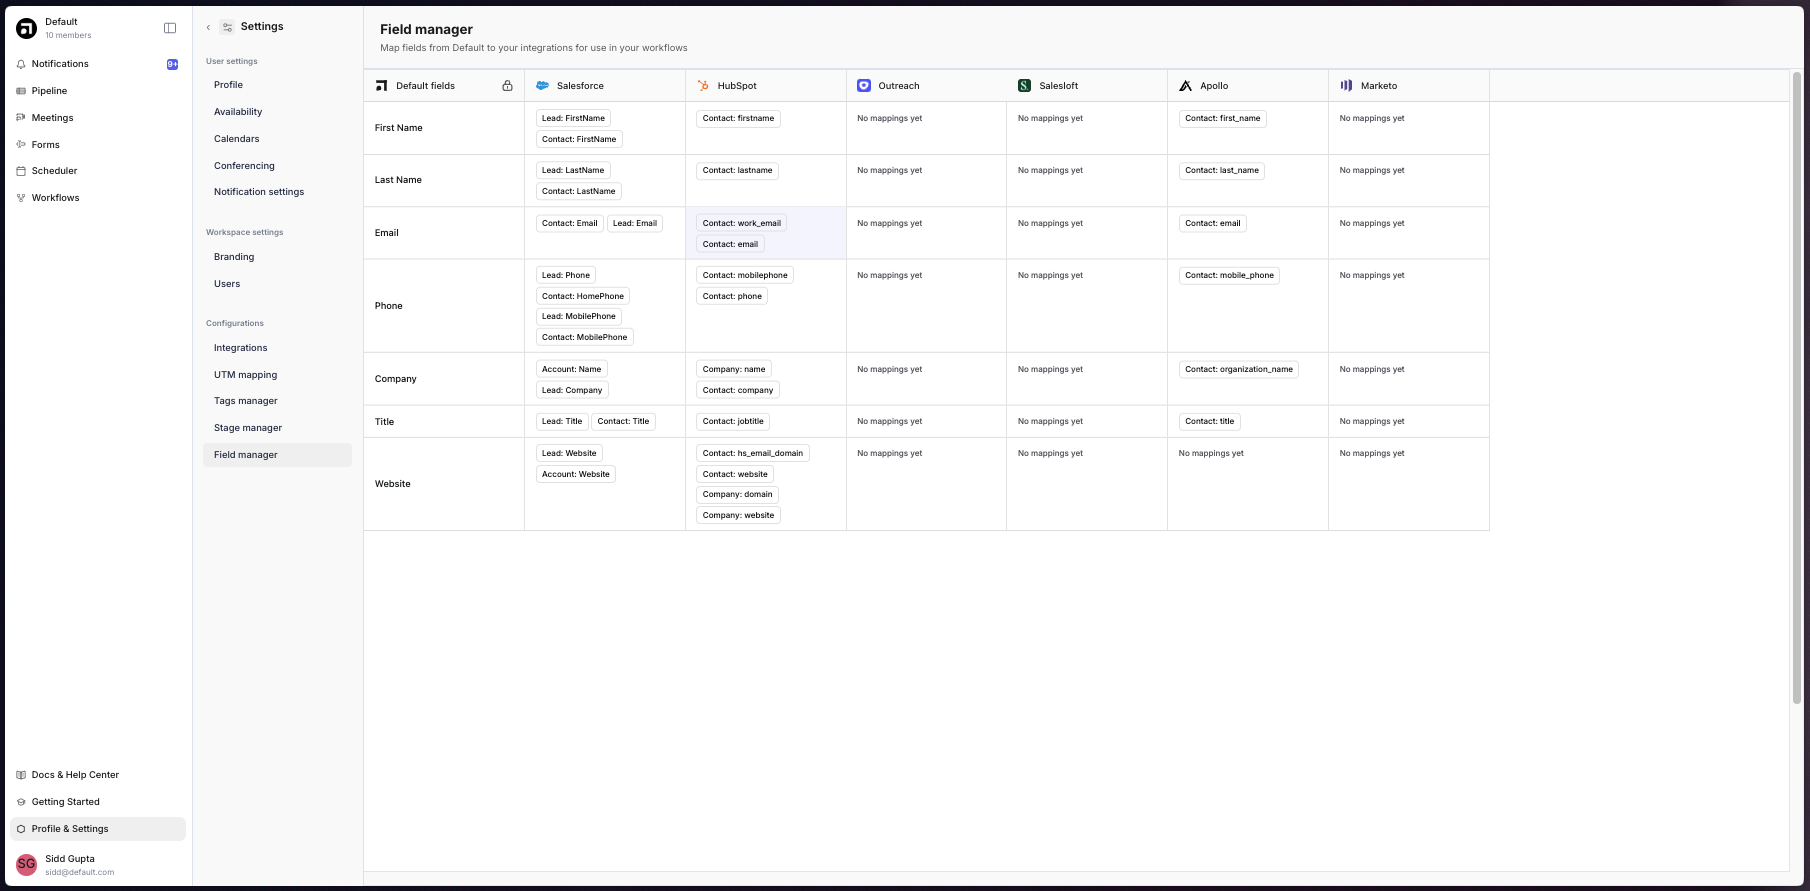
🗺️ 2. Field mapping
The Default field manager simplifies the process of auto-mapping Default lead attributes to their corresponding fields in your connected applications. This ensures seamless data synchronization across your tools. The following Default lead attributes can be mapped:
First nameLast nameEmailPhoneCompanyTitleWebsite
These attributes can be mapped to the following integrations:
Salesforce
HubSpot
Outreach
Salesloft
Apollo
Marketo