Queue configuration
A Queue consists of a group of members (queue members) that are tasked with being distributed leads. Queues can be configured to optimize one of the following outcomes:
Maximize availability
Maximize fairness
You can create Queues with Account Executives (AEs) who own meetings directly, or with Sales Development Representatives (SDRs) who qualify leads before routing them to AEs. Users that are added to queues are known as members.
Queues can be added to events. Specifically group events.
Types of queues
Max fairness
Max fairness queues distribute new meetings evenly among qualified members. To determine member qualification, Default checks:
Member priority level
Total meeting count
Total calibration count
If priority is even throughout the queue, then the rep with the lower meeting count + calibration count is deemed to be “next up”.
Note: Members with priority levels below 100% receive fewer assignments in the rotation cycle. Lowering priority levels are generally used when a team member is ramping.
Max availability
Max availability queues show all available meeting slots to leads. After a lead selects a time, the system uses max fairness logic to assign the appropriate member.
For example, for a queue with four members(A, B, C, D) in a queue and a lead selecting an 8:00 AM PT slot, the system:
Default identifies available members.
Default assigns the meeting to the member with the lowest combined total assignments and calibrations, factoring for priority levels.
The max availability queue functions identically to max fairness after time slot selection.
Note: For both max fairness and max availability queue types, when meetings are canceled or marked as a no-show, Default will automatically handle repositioning assigned members within the queue.
Important terminology
Calibration
Queue administrators can adjust member rankings using the calibration setting. This allows for manual adjustments to meeting distribution. To modify a member’s position in the queue, you can adjust their calibration value with either a positive or negative value:
A negative value (e.g.,
-1) gives the rep an extra turn in the queue - as if they’ve had one less meeting than what is shown.A positive value (e.g.,
1) skips the rep's next turn - treating them as if they’ve had one more meeting than what is shown.
Calibration counts are static values in Default, and should only be adjusted if you want to make further changes to someone's total meeting count. Future booked meetings that come in do not adjust the calibration count in any capacity.
Total Assignments
The number of meetings or leads assigned to a member using this queue.
Score
How its calculated:
Fairness Score = (Your assignments + calibrations) ÷ (Everyone's average assignments + calibrations) − (Your priority ÷ Everyone's average priority)
The score represents the positioning of the representative in the queue based on their total assignments and calibration. A lower score indicates that the member is more likely to get a meeting compared to a member with a higher score.
Score is effectively impacted / managed with the following:
Assignments via a queue
Meetings credited when booked via a queue (meeting canceled, meeting handoff, or meeting marked as no-show)
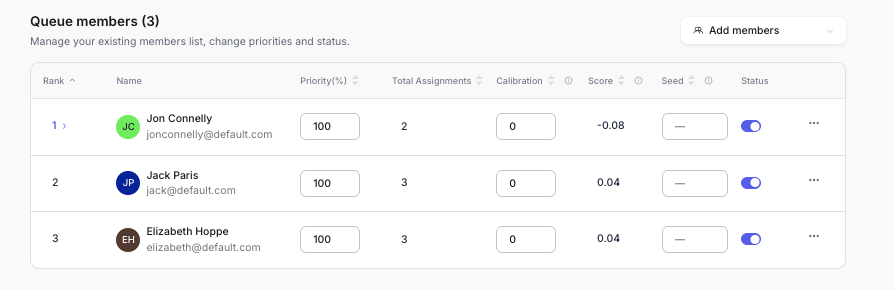
Status
The member’s status in the queue. Members can be enabled / disabled. A disabled member cannot be assigned a lead / meeting using a queue.
Members can also be disabled from Settings > Availability > Vacation Mode.
Creating and configuring a queue
1. Go to queues
Go to Navigation > Scheduler > Queues > Create a Queue. Choose between max fairness or max availability and name your queue appropriately. Common naming conventions include:
Regions (EMEA, APAC)
Territories (US West, US East)
Teams/Segments (Enterprise, MM)
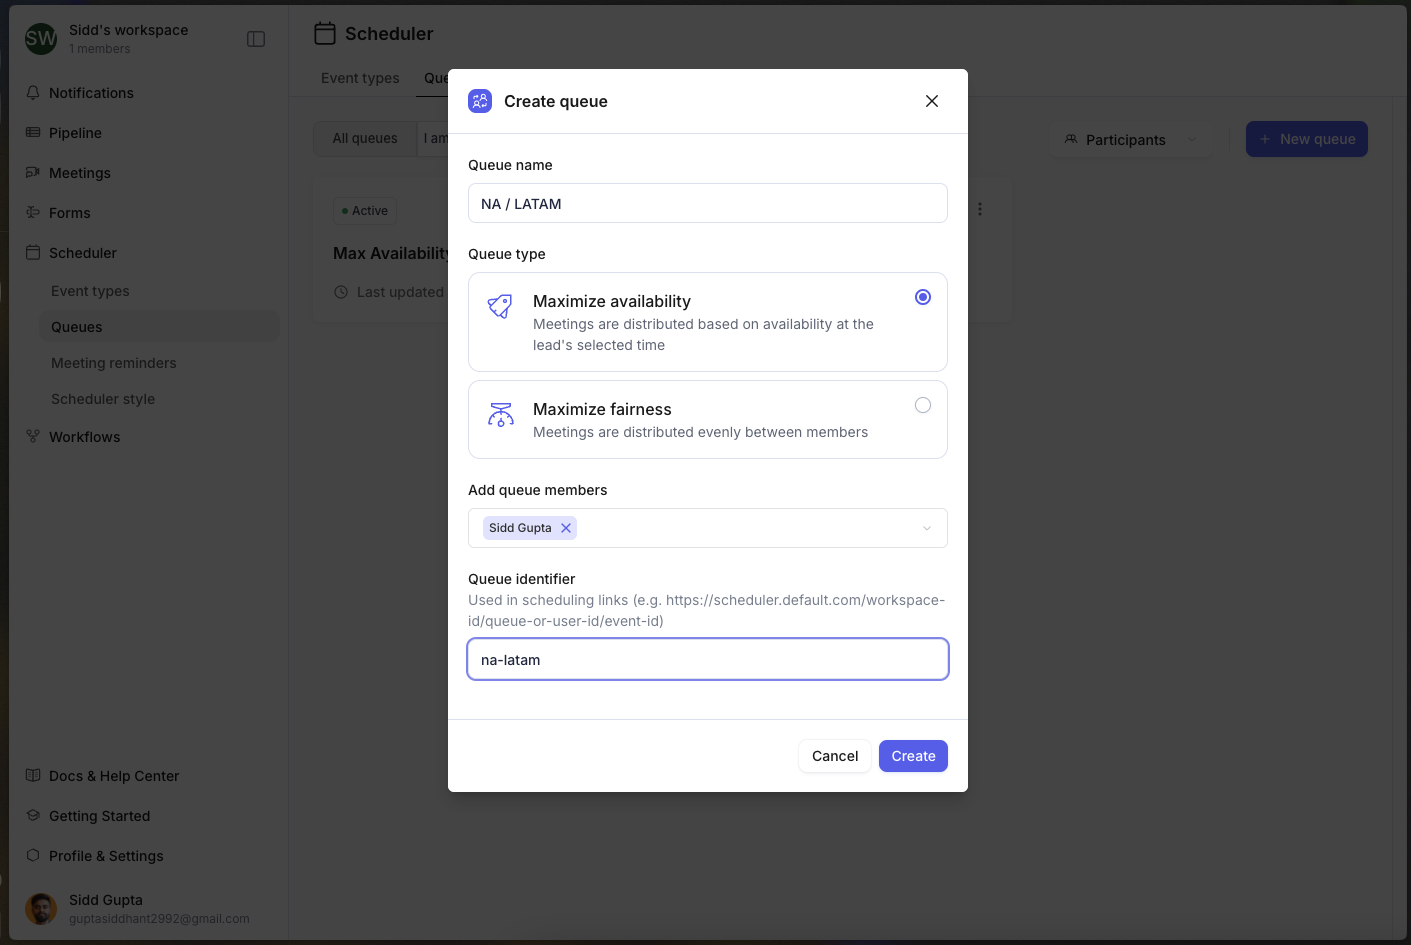
2. Add members to queue
Add the corresponding team members to your queue, and set a Priority percentage for each team member.
In order to add a team member to a queue, you need to make sure they have accepted their invite to Default.
The priority number determines a queue position using weighted averages. We suggest setting fully ramped members to 100% priority, and reduce the percentage for members still in ramp-up.
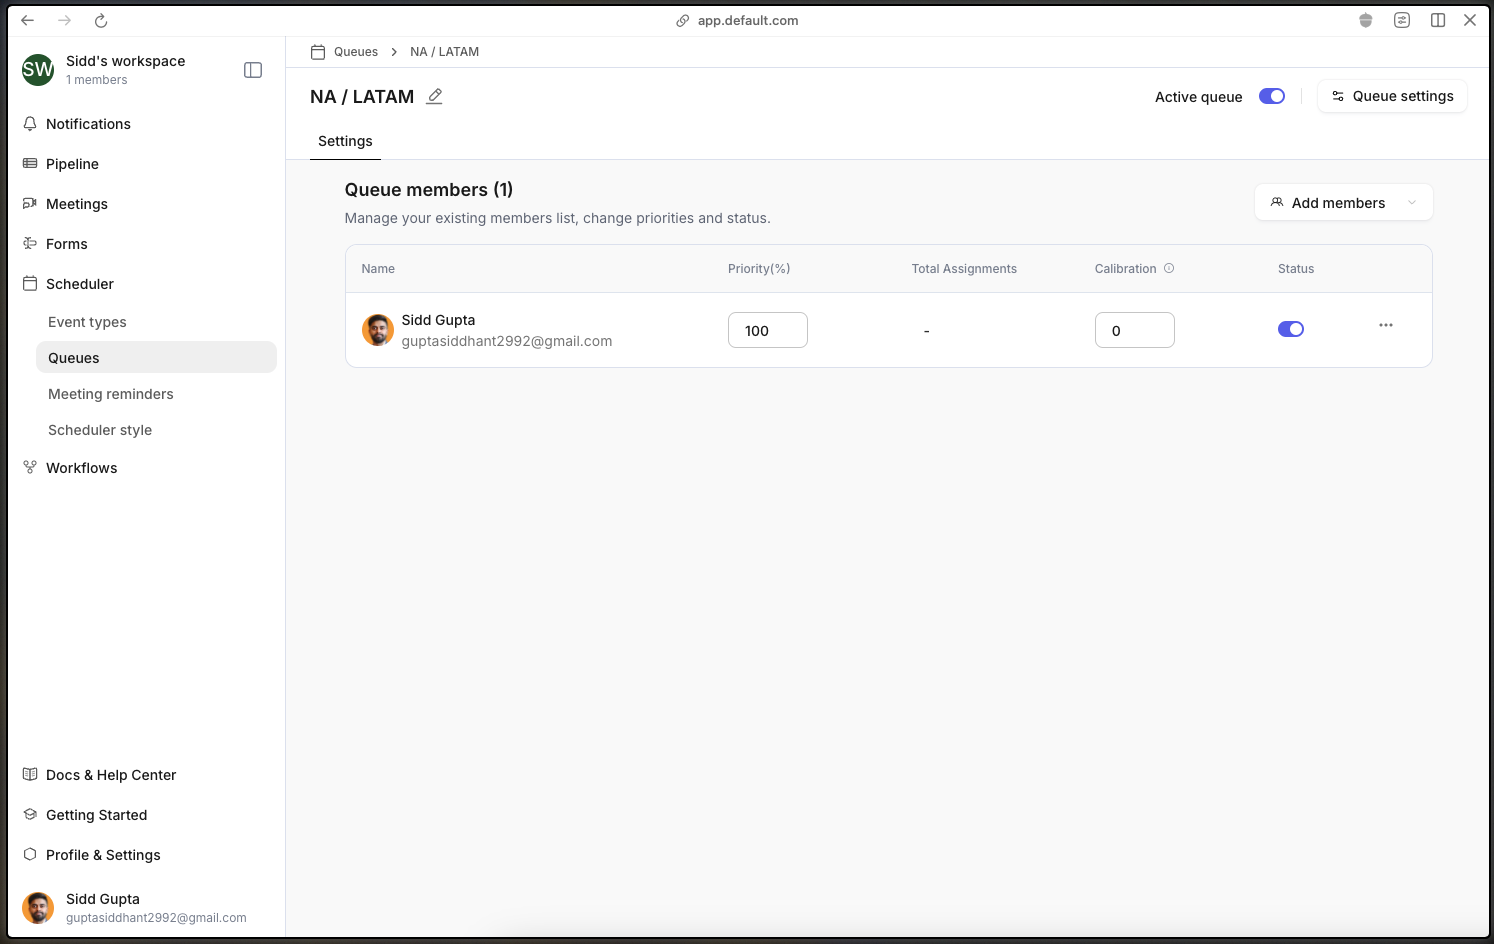
Members must connect their calendars to be eligible to receive meeting assignments. You can verify this from Settings > Users > User Mapping.
3. Add queue to workflow
Queues can be integrated into workflows in three ways:
Within Round Robin nodes for lead assignment.
In Display Scheduler nodes for individual queue member meetings.
As part of group events for multi-participant meetings, such as AE and Sales Engineer (or similar) pairings.
Note: When using queues with group events in Display Scheduler, you must first configure the queue within your group event settings. This cannot be done directly from the Display Scheduler.
Step 4: Use queue in outbound (optional)
Default allows you to copy and create a link to your queue when doing outbound campaigns You can access this from Events > Pick a Event > Copy Link > Select Queue.